/var/log $ cat "Building my own Pentest Linux - Part 1"
2019-07-22 | linux arch arch 2019.07.01 installation QEMU VirtualBox
Motivation
While using Linux distros designed for security/pentesting like Kali Linux, Parrot OS or BlackArch is handy, they don’t quite fit my taste. As they are fully feautred distributions they also come with a lot of overhead and tools I do not know or need. My usual goto Linux is Manjaro. But as it has no security focus it does not come with the tools equipped I need for my pentesting/CTFs stuff. And it also has a lot of overhead not needed for that purpose.
Also I do not want to use my daily OS for this as I want to keep it as tidy as possible. Hence I do not want stuff in there which should not belong there (like malware). Also it might be necessary to change configs or install something for test purposes which might leaf behind artifacts. Therefore I am using VMs which I easly can roll back after I’m done.
My initial approach was to use Manjaro (as the time of writing in version 18.04) and go from there. But the performance with QEMU/VirtualBox was far away from feeling like a bare metal installation, especially with 4K resolution even on my AMD R7 2700X. After doing some performance tweaking I ended up not really being satisfied. Next try was using Debian 10. The performance was really good, but I do not want to live without the Arch User Repository anymore.
Summing up my requirements of fast, lightweight, minimal and customized this marks the beginning of creating my own Arch-based Pentest Linux.
Basic Arch Installation
Reading through different Arch setup tutorials and especially the Installation guide from the ArchWiki (which I can highly recommend) I came up with an easy and straightforward procedure for the basic system installations (using release 2019.07.01) which works great in QEMU (tested with v4 on Linux 5.2) and VirtualBox (tested with v6 on Win10).
- Creat a VM, mount and boot Arch ISO image
loadkeys de-latin1or whatever keyboard layout you usefdisk -lto list the availabe disksfdisk /dev/<DISK>- in
fdiskcreat a new partiotion (n), set the boot flag (a) and write to disk (w) mkfs.ext4 /dev/<PARTITION>to format the new partition as ext4mount /dev/<PARTITION> /mntpacstrap /mnt base base-develto install ‘base’ and ‘base-devel’ package groupsgenfstab /mnt >> /mnt/etc/fstabto generate file system tablearch-chroot /mntln -sf /usr/share/zoneinfo/Europe/Berlin /etc/localtimeto set timezone to Europe/Berlin or whatever you arehwclock --systohcto sync time to hardware clocknano /etc/locale.genand uncomment the locales you wantlocale-genecho "LANG=en_US.UTF8" >> /etc/locale.confecho "KEYMAP=de-latin1" >> /etc/vconsole.confecho "<HOSTNAME>" >> /etc/hostnameto set hostname tonano /etc/hostsand add IPv4 and v6 localhost entriespasswdto set root passworduseradd -m <USERNAME>to add a new userpasswd <USERNAME>to set the password for usergpasswd -a <USERNAME> wheelto add user to ‘wheel’ groupnano /etc/sudoersand uncomment the entries you want or add a sudoer manuallypacman -S grubto install GRUB bootloadermkdir /boot/grubgrub-mkconfig -o /boot/grub/grub.cfgto generate GRUB config filegrub-install /dev/<DISK>to install GRUB in MBRexitumount /mntreboot
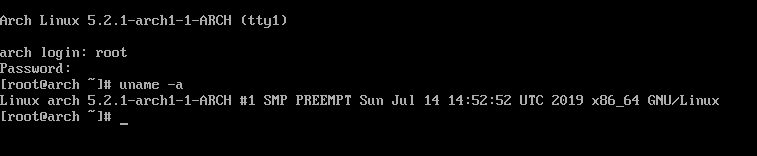
And this is what you get:
Next up is to do some basic configuration and setting up a usable desktop environment.